RoApp
1) Go to your RoApp portal.
2) In the left hand corner you need to go to the following section:
Settings > Chats and click on the "+ Channel" button
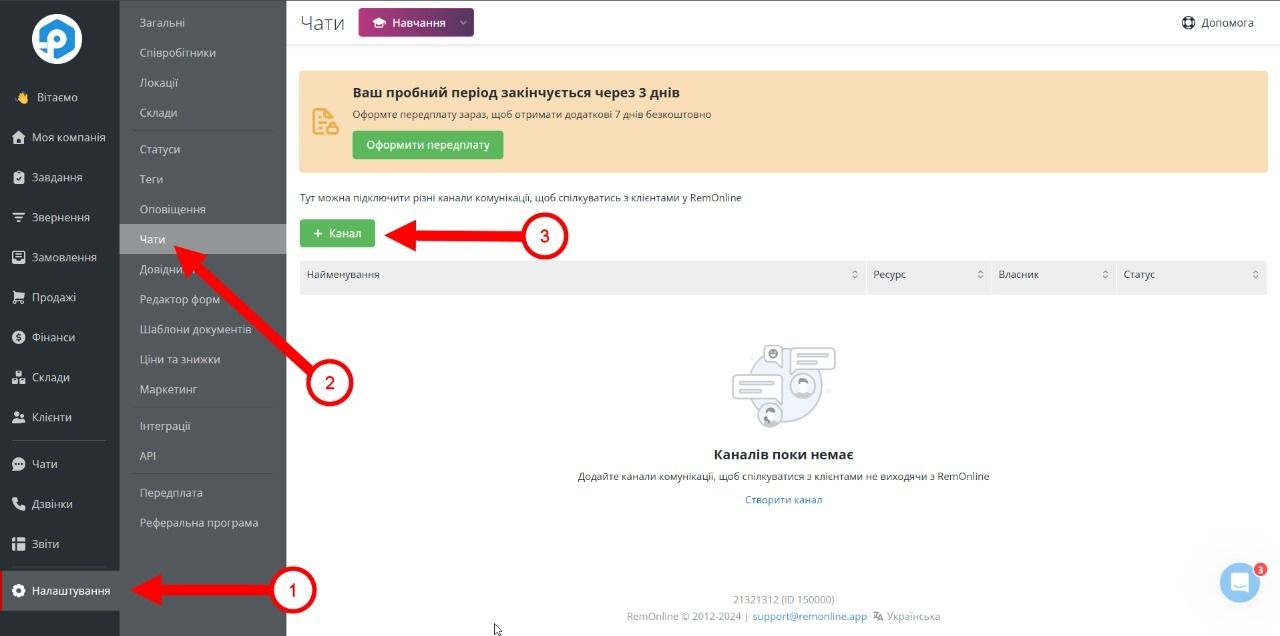
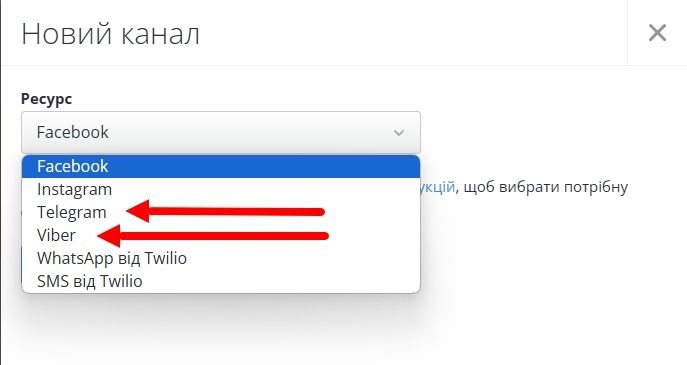
3) In the opened window you need to select one of the messengers you want to integrate into CRM. (Viber / Telegram)
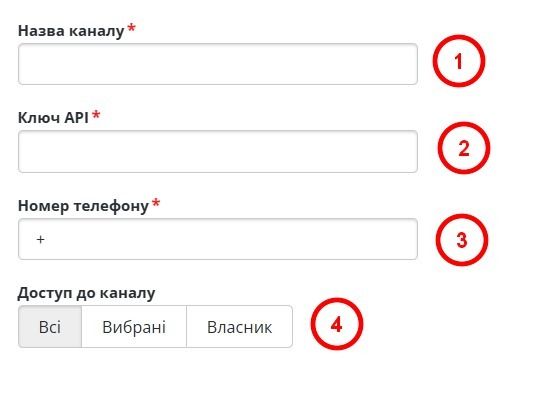
4) You will be presented with 4 fields to fill in:
Channel name - You will enter any name you want
API key - You can find the key in your personal cabinet on our website, in the "Integrations" section.
Phone number - You enter the number you want to integrate with.
Access to the channel:
- All - all employees of the company will have access to the Chat settings, provided that such access is allowed to them by the system;
- Selected - only selected employees will have access to the Chat settings, provided that such access is allowed by the system;
- Owner - only the Owner of the company will have access to the settings.
(To change the settings of employees' access to Chat and Chat settings, you should go to Settings > Employees > Roles and edit the necessary settings).
5) After filling in all the fields - click the button: "Create" at the very bottom.
Done. The integration has been successfully created.
You can learn how to work with chats in the following instructions